Sunday, September 2, 2012

Tutorial: Baby Legwarmers


Baby legwarmers have always been one of my favorite baby accessories.  We have always used cloth diapers and depending on the weather I don't usually want to add another layer around the diaper.  Baby legwarmers were the perfect solution.

You can keep baby warm and you don't have to take them off to change the diaper.  And they're not just for babies, they are fun for any kids. After I made some for this tutorial, both my kids wore them on their arms and legs all day.  There are different brands that you can buy but they are around $10 a pair. I'm going to show you how to refashion a pair of knee high socks into legwarmers.  Depending on the age of the baby or kid you are sewing for you are going to want to buy different socks. I bought womens knee high socks at Target for $2.50 a pair, which work well for bigger babies or kids.  I also bought a double pack of girls knee high socks ($3.99) and a double pack of womens dress socks($1.75) to make leg warmers for little babies. 
First you have to determine the length you would like the legwarmers.  I compared my socks to a pair of Babylegs legwarmers that I bought for my first son. They were about 10 inches.  The smaller socks I have will end up being about 10 inches and the larger socks will end up about 12 inches.  
Cut the socks in a straight line just about the heel. This will be the main part of you legwarmers. Then cut in a straight line just after the heel and before the toe, this part will be the cuff. Turn your cuffs in so that the wrong sides are together.

Turn the socks inside out and insert the cuff into the bottom of the sock. Keep the raw edges together.  


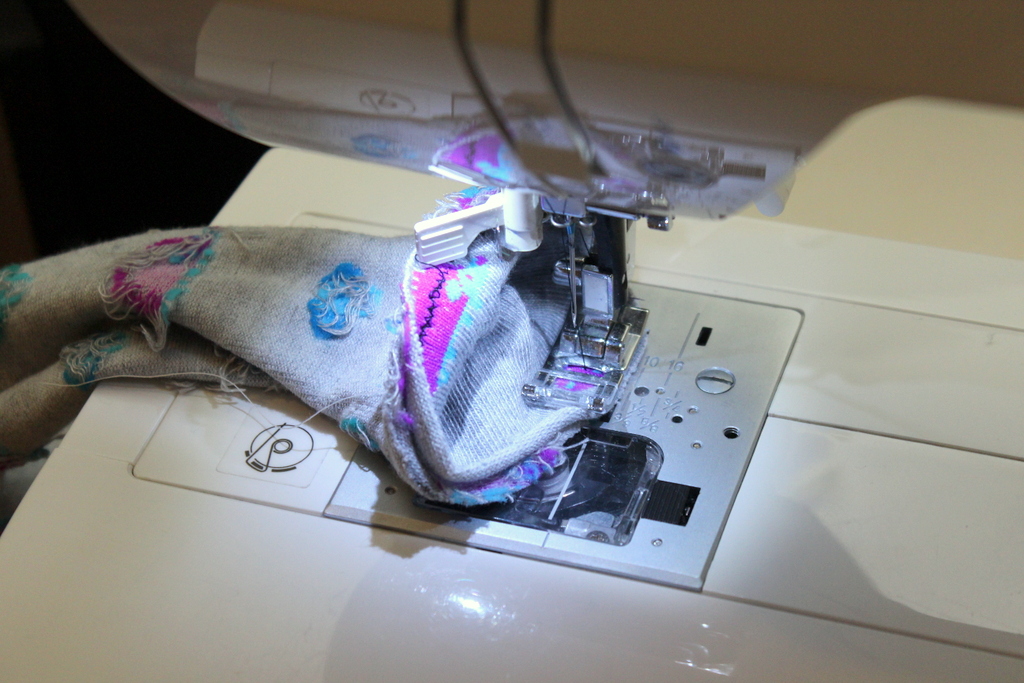
Time to go to your machine. If you have a serger, then lucky you, this will take no time and look great. I don't have a serger so I back stitched at the begining and end and I did a small zig zag stitch around the whole sock.  Be careful to keep the layers together or you will end up with holes.  


Turn your legwarmers inside out and you are finished.  I think it took me maybe 30 minutes to make all of these.  Have fun making your own.
-Ashley


Friday, August 31, 2012

The HEALTHIEST Yummiest Banana Bread


I grew up in a kitchen where no banana was wasted. If it had to many spots, into the freezer it went. Yesterday, I opened my freezer and had frozen bananas falling on my feet. The only appropriate action to take was to make banana bread!

The superfood I currently had on hand was chia seeds, and I wanted an alternative to sugary sweet, so when I came across this recipe http://cookieandkate.com/2011/honey-whole-wheat-banana-bread/ I was super happy and ready to put my own spin on it.

My kitchen has exactly 3 feet of counter space, so this one bowl wonder of a bread was a dream come true. I added extra bananas for more moisture (I'm always worried about my baking being too dry), and I added a pinch extra of cinnamon and some crushed almonds for a crunch.

I had to be careful not to eat too much when it came out of the oven and I got thumbs up from the neighbors I shared it with! Also, it's dairy free!

Lesson learned: don't be afraid to be a little creative with your additions, and you can never go wrong with adding an extra banana!

Ingredients

·         1/3 cup melted coconut oil, vegetable oil or olive oil

·         1/2 cup honey

·         2 eggs

·         1 cup mashed bananas (plus a little more if you have it)

·         2 tablespoons chia seeds (not soaked)

·         1 teaspoon vanilla extract

·         1/2 teaspoon salt

·         1/2 teaspoon nutmeg

·         1/2 teaspoon cinnamon, plus more to swirl on top

·         1 3/4 cups whole wheat pastry flour

·         1 teaspoon baking soda

·         1/4 cup hot water


Instructions

1.      Preheat oven to 325 degrees F (165 degrees C) and grease a 9×5 inch loaf pan.

2.      In a large bowl, beat oil and honey together.

3.      Add eggs, and beat well.

4.      Stir in bananas and vanilla, then stir in the salt and cinnamon. Add chia seeds and almonds (optional). Lastly, stir in the flour, just until combined.

5.      Add baking soda to hot water, stir to mix, and then add to the batter. (I found this helped the bread rise)

6.      Pour batter into the loaf pan.

7.      Sprinkle with cinnamon

8.      Bake for 55 to 60 minutes. Be sure to check that the bread is done baking by inserting a toothpick in the top. It should come out clean. I kept a super close eye on mine for the last 10 minutes so it wasn't over baked

9.      Let sit for 5 minutes on a cooling rack before slicing

10.  Spread on some butter or peanut butter and enjoy!

-Bethany

Wednesday, August 29, 2012

The BEST EVER Green Beans

I thought we could start the blog with one of my all time favorite recipes, Summer Green Bean Salad.
I'm very fortunate to be married to a chef.  I struggle to make simple meals good with planning but he can create amazing things from what we have in the cupboard.  I'm not really into food but when he first made this salad I realized that food can be amazing.

Ingredients:

1 lbs of green beans 
½ cup sliced almonds
½ cup raisins
½ cup grated cheese: My husband prefers Midnight Moon (aged goat gouda). If you don't like goat cheese, you can use Robusto (aged gouda) or even parmesan cheese.
black pepper to taste

Dressing:

1 bunch of dill
1 tbsp dijon mustard
2 tbsp honey
2 tbsp white wine vinegar
1 tbsp of sour cream
1 cup oil grapeseed oil 
½ tsp salt


Directions:

Prep the beans by taking the stems off. 

Pour boiling water over the raisins to soften and plump, set aside. Drain the water before adding to the salad.

Toast the almonds in the oven at 375 until golden brown. Be careful not to burn them.  

Bring a large pot of salted water to a rapid boil (should taste like sea salt).  You want to use a large pot because you don't want the water to cool down.  Once you add the beans cover with a lid so that it will return to a rapid boil as soon as possible.  Once the pot is at a rapid boil it should take 1 1/2 to 2 minutes. You want the beans tender.  As soon as the beans are cooked, put them in a bowl of ice water to stop them from cooking further.  Leave them in the ice water until they are cold then drain them and put them in a bowl.

The dressing is simple, just combine all the ingredients in the blender and blend until smooth. 

Combine all the ingredients in a large bowl. Add more or less cheese to your personal taste. Enjoy.

-Ashley